


<div style="position: fixed; z-index: 65535; left: 0px; bottom: -3px; width:100%;"> <marquee><a href="http://www.facebook.com/WidgetGenerators" target="blank"> <abbr title="Follow us at Facebook"><img src="https://blogger.googleusercontent.com/img/b/R29vZ2xl/AVvXsEjYeU4CkSZcyLthOhDuE4wdw09hjZHFomPuamCqqbbIAlahZUg9AN5HH_y6TkfMAgAShPXt2utTbooSLgO9luEqIfmXva7Wd6z3Tl2agfML8Xudn4NkyEfvZ81HT4277yPEy8Lasnu2S_8i/s1600/Social-Truck_fb2.png" width="120px" height="100px"/> </abbr> </a> <a href="http://feeds.feedburner.com/WidgetGenerators" target="blank"> <abbr title="Subscribe Our Feeds"><img src="https://blogger.googleusercontent.com/img/b/R29vZ2xl/AVvXsEgBR_4XRiiAek9k_qefDrOYaQpG4MhFmzc-rZLV2cWejHVnataDjLn5xDxCPKAPh9dOSYN91NmbQ13sQts_ReKqidqd2dIhSNBnYJhQmfESXT_52_Qb9xB9hGiRH85Q91MEqcBSREIgz8fm/s1600/Social-Truck_rss.png" width="120px" height="100px"/> </abbr> </a><a href="http://twitter.com/WidgetGenerator" target="blank"> <abbr title="Follow Us on Twitter"><img src="https://blogger.googleusercontent.com/img/b/R29vZ2xl/AVvXsEgHyPIQ1lLujSLOVZQJQ4q0SU3oU2w39oL8DkjmECrgUF0J9T3eX166uc_12SxcvOVviiE5TPeLZWx8dLwloYT6JI8dNMuNQMTeBQaSVpkSO9YruxUBO0AUZFI9D7HelS32V1emQXxZhXcP/s1600/Social-Truck_twi.png" width="120px" height="100px"/> </abbr> </a> </marquee></div>
auto-unboxing
Ex:
int inative = 0;
inative = new Integer(5); // auto-unboxing

Autoboxing also works with comparison
int a = 10;
Integer b = 10;
System.out.println(a==b); // true
public static int count_Chars(String given, char key)
{
    int count = 0;
    for (int i=0; i < given.length(); i++)
    {
        if (given.charAt(i) == key)
        {
             count++;
        }
    }
    return count;
}private void setGPSOn()
{
String provider = Settings.Secure.getString(getContentResolver(), Settings.Secure.LOCATION_PROVIDERS_ALLOWED);
if(!provider.contains("gps"))
{
//if gps is disabled
final Intent poke = new Intent();
poke.setClassName("com.android.settings", "com.android.settings.widget.SettingsAppWidgetProvider");
poke.addCategory(Intent.CATEGORY_ALTERNATIVE);
poke.setData(Uri.parse("3"));
sendBroadcast(poke);
}
}
private void setGPSOff(){
String provider = Settings.Secure.getString(getContentResolver(), Settings.Secure.LOCATION_PROVIDERS_ALLOWED);
if(provider.contains("gps"))
{
//if gps is enabled
final Intent poke = new Intent();
poke.setClassName("com.android.settings", "com.android.settings.widget.SettingsAppWidgetProvider");
poke.addCategory(Intent.CATEGORY_ALTERNATIVE);
poke.setData(Uri.parse("3"));
sendBroadcast(poke);
}
}// Gets a reference to our radio group
// rBtnDigits is the name of our radio group (code not shown)
RadioGroup g = (RadioGroup) findViewById(R.id.rBtnDigits);
// Returns an integer which represents the selected radio button's ID
int selected = g.getCheckedRadioButtonId();
// Gets a reference to our "selected" radio button
RadioButton b = (RadioButton) findViewById(selected);
// Now you can get the text or whatever you want from the "selected" radio button
b.getText();
import com.google.gwt.user.client.DOM;
//pass in your own TextBox when you construct the SB:
TextBox tb = new TextBox();
SuggestBox sb = new SuggestBox(oracle, tb);
//and disable the TextBox it can effect to SuggestBox
tb.setEnabled(false);
// and enable the TextBox it can effect to SuggestBox
tb.setEnabled(true);public static void setEnabled(SuggestBox sb,boolean enabled)
{
DOM.setElementPropertyBoolean(sb.getElement(), "disabled", !enabled);
}
PackageManager , hasSystemFeature() method to check if a device has camera, gps or other features.PackageManager in an activity class.package com.mkyong.android;
import android.app.Activity;
import android.content.Context;
import android.content.pm.PackageManager;
import android.os.Bundle;
import android.util.Log;
public class FlashLightActivity extends Activity {
@Override
public void onCreate(Bundle savedInstanceState) {
super.onCreate(savedInstanceState);
//setContentView(R.layout.main);
Context context = this;
PackageManager packageManager = context.getPackageManager();
// if device support camera?
if (packageManager.hasSystemFeature(PackageManager.FEATURE_CAMERA)) {
//yes
Log.i("camera", "This device has camera!");
}else{
//no
Log.i("camera", "This device has no camera!");
}
}
}
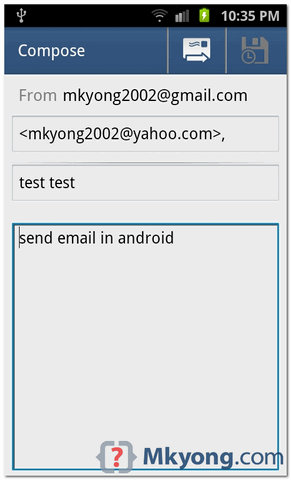
Intent.ACTION_SEND to call an existing email client to send an Email.Intent email = new Intent(Intent.ACTION_SEND);
email.putExtra(Intent.EXTRA_EMAIL, new String[]{"youremail@yahoo.com"});
email.putExtra(Intent.EXTRA_SUBJECT, "subject");
email.putExtra(Intent.EXTRA_TEXT, "message");
email.setType("message/rfc822");
startActivity(Intent.createChooser(email, "Choose an Email client :"));
<?xml version="1.0" encoding="utf-8"?>
<LinearLayout xmlns:android="http://schemas.android.com/apk/res/android"
    android:id="@+id/linearLayout1"
    android:layout_width="fill_parent"
    android:layout_height="fill_parent"
    android:orientation="vertical" >

    <TextView
        android:id="@+id/textViewPhoneNo"
        android:layout_width="wrap_content"
        android:layout_height="wrap_content"
        android:text="To : "
        android:textAppearance="?android:attr/textAppearanceLarge" />

    <EditText
        android:id="@+id/editTextTo"
        android:layout_width="fill_parent"
        android:layout_height="wrap_content"
        android:inputType="textEmailAddress" >

        <requestFocus />

    </EditText>

    <TextView
        android:id="@+id/textViewSubject"
        android:layout_width="wrap_content"
        android:layout_height="wrap_content"
        android:text="Subject : "
        android:textAppearance="?android:attr/textAppearanceLarge" />

    <EditText
        android:id="@+id/editTextSubject"
        android:layout_width="fill_parent"
        android:layout_height="wrap_content"
         >
    </EditText>

    <TextView
        android:id="@+id/textViewMessage"
        android:layout_width="wrap_content"
        android:layout_height="wrap_content"
        android:text="Message : "
        android:textAppearance="?android:attr/textAppearanceLarge" />

    <EditText
        android:id="@+id/editTextMessage"
        android:layout_width="fill_parent"
        android:layout_height="wrap_content"
        android:gravity="top"
        android:inputType="textMultiLine"
        android:lines="5" />

    <Button
        android:id="@+id/buttonSend"
        android:layout_width="fill_parent"
        android:layout_height="wrap_content"
        android:text="Send" />

</LinearLayout>
onClick() method, it should be self-explanatory.package com.mkyong.android;
import android.app.Activity;
import android.content.Intent;
import android.os.Bundle;
import android.view.View;
import android.view.View.OnClickListener;
import android.widget.Button;
import android.widget.EditText;
public class SendEmailActivity extends Activity {
Button buttonSend;
EditText textTo;
EditText textSubject;
EditText textMessage;
@Override
public void onCreate(Bundle savedInstanceState) {
super.onCreate(savedInstanceState);
setContentView(R.layout.main);
buttonSend = (Button) findViewById(R.id.buttonSend);
textTo = (EditText) findViewById(R.id.editTextTo);
textSubject = (EditText) findViewById(R.id.editTextSubject);
textMessage = (EditText) findViewById(R.id.editTextMessage);
buttonSend.setOnClickListener(new OnClickListener() {
@Override
public void onClick(View v) {
String to = textTo.getText().toString();
String subject = textSubject.getText().toString();
String message = textMessage.getText().toString();
Intent email = new Intent(Intent.ACTION_SEND);
email.putExtra(Intent.EXTRA_EMAIL, new String[]{ to});
//email.putExtra(Intent.EXTRA_CC, new String[]{ to});
//email.putExtra(Intent.EXTRA_BCC, new String[]{to});
email.putExtra(Intent.EXTRA_SUBJECT, subject);
email.putExtra(Intent.EXTRA_TEXT, message);
//need this to prompts email client only
email.setType("message/rfc822");
startActivity(Intent.createChooser(email, "Choose an Email client :"));
}
});
}
}


SmsManager API or device’s Built-in SMS application to send a SMS message. In this tutorial, we show you two basic examples to send SMS message :SmsManager smsManager = SmsManager.getDefault();
smsManager.sendTextMessage("phoneNo", null, "sms message", null, null);
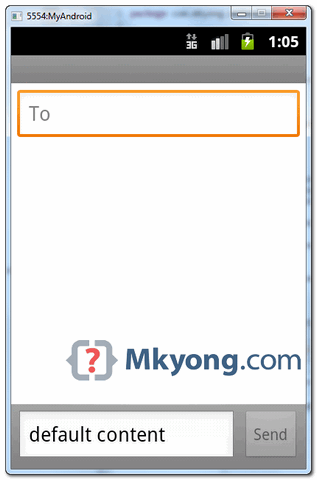
	Intent sendIntent = new Intent(Intent.ACTION_VIEW);
	sendIntent.putExtra("sms_body", "default content");
	sendIntent.setType("vnd.android-dir/mms-sms");
	startActivity(sendIntent);
<uses-permission android:name="android.permission.SEND_SMS" />
<?xml version="1.0" encoding="utf-8"?>
<LinearLayout xmlns:android="http://schemas.android.com/apk/res/android"
    android:id="@+id/linearLayout1"
    android:layout_width="fill_parent"
    android:layout_height="fill_parent"
    android:orientation="vertical" >

    <TextView
        android:id="@+id/textViewPhoneNo"
        android:layout_width="wrap_content"
        android:layout_height="wrap_content"
        android:text="Enter Phone Number : "
        android:textAppearance="?android:attr/textAppearanceLarge" />

    <EditText
        android:id="@+id/editTextPhoneNo"
        android:layout_width="fill_parent"
        android:layout_height="wrap_content"
        android:phoneNumber="true" >
    </EditText>

    <TextView
        android:id="@+id/textViewSMS"
        android:layout_width="wrap_content"
        android:layout_height="wrap_content"
        android:text="Enter SMS Message : "
        android:textAppearance="?android:attr/textAppearanceLarge" />

    <EditText
        android:id="@+id/editTextSMS"
        android:layout_width="fill_parent"
        android:layout_height="wrap_content"
        android:inputType="textMultiLine"
        android:lines="5"
        android:gravity="top" />

    <Button
        android:id="@+id/buttonSend"
        android:layout_width="fill_parent"
        android:layout_height="wrap_content"
        android:text="Send" />

</LinearLayout>
SmsManager.package com.mkyong.android;
import android.app.Activity;
import android.os.Bundle;
import android.telephony.SmsManager;
import android.view.View;
import android.view.View.OnClickListener;
import android.widget.Button;
import android.widget.EditText;
import android.widget.Toast;
public class SendSMSActivity extends Activity {
Button buttonSend;
EditText textPhoneNo;
EditText textSMS;
@Override
public void onCreate(Bundle savedInstanceState) {
super.onCreate(savedInstanceState);
setContentView(R.layout.main);
buttonSend = (Button) findViewById(R.id.buttonSend);
textPhoneNo = (EditText) findViewById(R.id.editTextPhoneNo);
textSMS = (EditText) findViewById(R.id.editTextSMS);
buttonSend.setOnClickListener(new OnClickListener() {
@Override
public void onClick(View v) {
String phoneNo = textPhoneNo.getText().toString();
String sms = textSMS.getText().toString();
try {
SmsManager smsManager = SmsManager.getDefault();
smsManager.sendTextMessage(phoneNo, null, sms, null, null);
Toast.makeText(getApplicationContext(), "SMS Sent!",
Toast.LENGTH_LONG).show();
} catch (Exception e) {
Toast.makeText(getApplicationContext(),
"SMS faild, please try again later!",
Toast.LENGTH_LONG).show();
e.printStackTrace();
}
}
});
}
}
<?xml version="1.0" encoding="utf-8"?>
<manifest xmlns:android="http://schemas.android.com/apk/res/android"
    package="com.mkyong.android"
    android:versionCode="1"
    android:versionName="1.0" >

    <uses-sdk android:minSdkVersion="10" />

    <uses-permission android:name="android.permission.SEND_SMS" />

    <application
        android:debuggable="true"
        android:icon="@drawable/ic_launcher"
        android:label="@string/app_name" >
        <activity
            android:label="@string/app_name"
            android:name=".SendSMSActivity" >
            <intent-filter >
                <action android:name="android.intent.action.MAIN" />
                <category android:name="android.intent.category.LAUNCHER" />
            </intent-filter>
        </activity>
    </application>

</manifest>

<?xml version="1.0" encoding="utf-8"?>
<LinearLayout xmlns:android="http://schemas.android.com/apk/res/android"
    android:id="@+id/linearLayout1"
    android:layout_width="fill_parent"
    android:layout_height="fill_parent"
    android:orientation="vertical" >

    <Button
        android:id="@+id/buttonSend"
        android:layout_width="fill_parent"
        android:layout_height="wrap_content"
        android:text="Send" />

</LinearLayout>
package com.mkyong.android;

import android.app.Activity;
import android.content.Intent;
import android.os.Bundle;
import android.view.View;
import android.view.View.OnClickListener;
import android.widget.Button;
import android.widget.Toast;

public class SendSMSActivity extends Activity {

	Button buttonSend;

	@Override
	public void onCreate(Bundle savedInstanceState) {
		super.onCreate(savedInstanceState);
		setContentView(R.layout.main);

		buttonSend = (Button) findViewById(R.id.buttonSend);

		buttonSend.setOnClickListener(new OnClickListener() {

			@Override
			public void onClick(View v) {

				try {

				     Intent sendIntent = new Intent(Intent.ACTION_VIEW);
				     sendIntent.putExtra("sms_body", "default content");
				     sendIntent.setType("vnd.android-dir/mms-sms");
				     startActivity(sendIntent);

				} catch (Exception e) {
					Toast.makeText(getApplicationContext(),
						"SMS faild, please try again later!",
						Toast.LENGTH_LONG).show();
					e.printStackTrace();
				}
			}
		});
	}
}

android.content.Intent” to open an specify URL in Android’s web browser. button.setOnClickListener(new OnClickListener() {
@Override
public void onClick(View arg0) {
Intent intent = new Intent(Intent.ACTION_VIEW,
Uri.parse("http://www.mkyong.com"));
startActivity(intent);
}
});<activity
android:label="Logo"
android:name=".logoActivity" >
<intent-filter >
<action android:name="android.intent.action.MAIN" />
<category android:name="android.intent.category.LAUNCHER" />
</intent-filter>
</activity>
ListMobileActivity” activity as the starting activity of your application.<?xml version="1.0" encoding="utf-8"?>
<manifest xmlns:android="http://schemas.android.com/apk/res/android"
package="com.mkyong.android"
android:versionCode="1"
android:versionName="1.0" >
<uses-sdk android:minSdkVersion="10" />
<application
android:icon="@drawable/ic_launcher"
android:label="@string/app_name" >
<activity
android:label="List of Mobile OS"
android:name=".ListMobileActivity" >
<intent-filter >
<action android:name="android.intent.action.MAIN" />
<category android:name="android.intent.category.LAUNCHER" />
</intent-filter>
</activity>
<activity
android:label="List of Fruits"
android:name=".ListFruitActivity" >
</activity>
</application>
</manifest>
ListFruitActivity” activity as your starting activity, just cut and paste the “intent-filter” like following :<?xml version="1.0" encoding="utf-8"?>
<manifest xmlns:android="http://schemas.android.com/apk/res/android"
package="com.mkyong.android"
android:versionCode="1"
android:versionName="1.0" >
<uses-sdk android:minSdkVersion="10" />
<application
android:icon="@drawable/ic_launcher"
android:label="@string/app_name" >
<activity
android:label="List of Mobile OS"
android:name=".ListMobileActivity" >
</activity>
<activity
android:label="List of Fruits"
android:name=".ListFruitActivity" >
<intent-filter >
<action android:name="android.intent.action.MAIN" />
<category android:name="android.intent.category.LAUNCHER" />
</intent-filter>
</activity>
</application>
</manifest>
1 2 3 4 5 6 7 8 9 10 11 12 13 14 15 16 17 18 19 20 21 22 23 24 25 26 27 28 29 30 31 32 33 34 35 36 | package com.journaldev.sort;import java.util.ArrayList;import java.util.Arrays;import java.util.Collections;import java.util.List;public class JavaObjectSorting { /** * This class shows how to sort primitive arrays, * Wrapper classes Object Arrays * @param args */ public static void main(String[] args) { //sort primitives array like int array int[] intArr = {5,9,1,10}; Arrays.sort(intArr); System.out.println(Arrays.toString(intArr)); //sorting String array String[] strArr = {"A", "C", "B", "Z", "E"}; Arrays.sort(strArr); System.out.println(Arrays.toString(intArr)); //sorting list of objects of Wrapper classes List<String> strList = new ArrayList<String>(); strList.add("A"); strList.add("C"); strList.add("B"); strList.add("Z"); strList.add("E"); Collections.sort(strList); for(String str: strList) System.out.print(" "+str); }} |
1 2 3 | [1, 5, 9, 10][1, 5, 9, 10] A B C E Z |
1 2 3 4 5 6 7 8 9 10 11 12 13 14 15 16 17 18 19 20 21 22 23 24 25 26 27 28 29 30 31 32 33 34 35 36 37 38 39 40 | package com.journaldev.sort;public class Employee { private int id; private String name; private int age; private long salary; public int getId() { return id; } public String getName() { return name; } public int getAge() { return age; } public long getSalary() { return salary; } public Employee(int id, String name, int age, int salary) { this.id = id; this.name = name; this.age = age; this.salary = salary; } @Override //this is overriden to print the user friendly information about the Employee public String toString() { return "[id=" + this.id + ", name=" + this.name + ", age=" + this.age + ", salary=" + this.salary + "]"; }} |
1 2 3 4 5 6 7 8 9 | //sorting custom object arrayEmployee[] empArr = new Employee[4];empArr[0] = new Employee(10, "Mikey", 25, 10000);empArr[1] = new Employee(20, "Arun", 29, 20000);empArr[2] = new Employee(5, "Lisa", 35, 5000);empArr[3] = new Employee(1, "Pankaj", 32, 50000);//sorting employees array using Comparable interface implementationArrays.sort(empArr);System.out.println("Default Sorting of Employees list:\n"+Arrays.toString(empArr)); |
1 2 3 4 5 6 | Exception in thread "main" java.lang.ClassCastException: com.journaldev.sort.Employee cannot be cast to java.lang.Comparable at java.util.ComparableTimSort.countRunAndMakeAscending(ComparableTimSort.java:290) at java.util.ComparableTimSort.sort(ComparableTimSort.java:157) at java.util.ComparableTimSort.sort(ComparableTimSort.java:146) at java.util.Arrays.sort(Arrays.java:472) at com.journaldev.sort.JavaSorting.main(JavaSorting.java:41) |
1 2 3 4 5 6 7 8 9 10 11 12 13 14 15 16 17 18 19 20 21 22 23 24 25 26 27 28 29 30 31 32 33 34 35 36 37 38 39 40 41 42 43 44 45 46 47 48 49 50 | package com.journaldev.sort;import java.util.Comparator;public class Employee implements Comparable<Employee> { private int id; private String name; private int age; private long salary; public int getId() { return id; } public String getName() { return name; } public int getAge() { return age; } public long getSalary() { return salary; } public Employee(int id, String name, int age, int salary) { this.id = id; this.name = name; this.age = age; this.salary = salary; } @Override public int compareTo(Employee emp) { //let's sort the employee based on id in ascending order //returns a negative integer, zero, or a positive integer as this employee id //is less than, equal to, or greater than the specified object. return (this.id - emp.id); } @Override //this is required to print the user friendly information about the Employee public String toString() { return "[id=" + this.id + ", name=" + this.name + ", age=" + this.age + ", salary=" + this.salary + "]"; }} |
1 2 | Default Sorting of Employees list:[[id=1, name=Pankaj, age=32, salary=50000], [id=5, name=Lisa, age=35, salary=5000], [id=10, name=Mikey, age=25, salary=10000], [id=20, name=Arun, age=29, salary=20000]] |
1 2 3 4 5 6 7 8 9 10 11 12 13 14 15 16 17 18 19 20 21 22 23 24 25 26 27 28 29 30 31 32 | /** * Comparator to sort employees list or array in order of Salary */ public static Comparator<Employee> SalaryComparator = new Comparator<Employee>() { @Override public int compare(Employee e1, Employee e2) { return (int) (e1.getSalary() - e2.getSalary()); } }; /** * Comparator to sort employees list or array in order of Age */ public static Comparator<Employee> AgeComparator = new Comparator<Employee>() { @Override public int compare(Employee e1, Employee e2) { return e1.getAge() - e2.getAge(); } }; /** * Comparator to sort employees list or array in order of Name */ public static Comparator<Employee> NameComparator = new Comparator<Employee>() { @Override public int compare(Employee e1, Employee e2) { return e1.getName().compareTo(e2.getName()); } }; |
1 2 3 4 5 6 7 8 9 | //sort employees array using Comparator by SalaryArrays.sort(empArr, Employee.SalaryComparator);System.out.println("Employees list sorted by Salary:\n"+Arrays.toString(empArr));//sort employees array using Comparator by AgeArrays.sort(empArr, Employee.AgeComparator);System.out.println("Employees list sorted by Age:\n"+Arrays.toString(empArr));//sort employees array using Comparator by NameArrays.sort(empArr, Employee.NameComparator);System.out.println("Employees list sorted by Name:\n"+Arrays.toString(empArr)); |
1 2 3 4 5 6 | Employees list sorted by Salary:[[id=5, name=Lisa, age=35, salary=5000], [id=10, name=Mikey, age=25, salary=10000], [id=20, name=Arun, age=29, salary=20000], [id=1, name=Pankaj, age=32, salary=50000]]Employees list sorted by Age:[[id=10, name=Mikey, age=25, salary=10000], [id=20, name=Arun, age=29, salary=20000], [id=1, name=Pankaj, age=32, salary=50000], [id=5, name=Lisa, age=35, salary=5000]]Employees list sorted by Name:[[id=20, name=Arun, age=29, salary=20000], [id=5, name=Lisa, age=35, salary=5000], [id=10, name=Mikey, age=25, salary=10000], [id=1, name=Pankaj, age=32, salary=50000]] |
1 2 3 4 5 6 7 8 9 10 11 12 13 14 15 16 17 18 19 20 21 22 23 24 25 26 27 28 29 30 31 32 33 34 35 36 37 38 39 40 41 42 43 44 45 46 47 48 49 50 51 52 53 54 55 56 57 58 59 60 61 62 63 64 65 66 67 68 69 70 71 72 73 74 75 76 77 78 79 80 81 82 | package com.journaldev.sort;import java.util.Comparator;public class Employee implements Comparable<Employee> { private int id; private String name; private int age; private long salary; public int getId() { return id; } public String getName() { return name; } public int getAge() { return age; } public long getSalary() { return salary; } public Employee(int id, String name, int age, int salary) { this.id = id; this.name = name; this.age = age; this.salary = salary; } @Override public int compareTo(Employee emp) { //let's sort the employee based on id in ascending order //returns a negative integer, zero, or a positive integer as this employee id //is less than, equal to, or greater than the specified object. return (this.id - emp.id); } @Override //this is required to print the user friendly information about the Employee public String toString() { return "[id=" + this.id + ", name=" + this.name + ", age=" + this.age + ", salary=" + this.salary + "]"; } /** * Comparator to sort employees list or array in order of Salary */ public static Comparator<Employee> SalaryComparator = new Comparator<Employee>() { @Override public int compare(Employee e1, Employee e2) { return (int) (e1.getSalary() - e2.getSalary()); } }; /** * Comparator to sort employees list or array in order of Age */ public static Comparator<Employee> AgeComparator = new Comparator<Employee>() { @Override public int compare(Employee e1, Employee e2) { return e1.getAge() - e2.getAge(); } }; /** * Comparator to sort employees list or array in order of Name */ public static Comparator<Employee> NameComparator = new Comparator<Employee>() { @Override public int compare(Employee e1, Employee e2) { return e1.getName().compareTo(e2.getName()); } };} |
1 2 3 4 5 6 7 8 9 10 11 12 13 14 | package com.journaldev.sort;import java.util.Comparator;public class EmployeeComparatorByIdAndName implements Comparator<Employee> { @Override public int compare(Employee o1, Employee o2) { int flag = o1.getId() - o2.getId(); if(flag==0) flag = o1.getName().compareTo(o2.getName()); return flag; }} |
1 2 3 4 5 6 7 8 9 10 11 12 13 14 15 16 17 18 19 20 21 22 23 24 25 26 27 28 29 30 31 32 33 34 35 36 37 38 39 40 41 42 43 | package com.journaldev.sort;import java.util.Arrays;public class JavaObjectSorting { /** * This class shows how to sort custom objects array/list * implementing Comparable and Comparator interfaces * @param args */ public static void main(String[] args) { //sorting custom object array Employee[] empArr = new Employee[4]; empArr[0] = new Employee(10, "Mikey", 25, 10000); empArr[1] = new Employee(20, "Arun", 29, 20000); empArr[2] = new Employee(5, "Lisa", 35, 5000); empArr[3] = new Employee(1, "Pankaj", 32, 50000); //sorting employees array using Comparable interface implementation Arrays.sort(empArr); System.out.println("Default Sorting of Employees list:\n"+Arrays.toString(empArr)); //sort employees array using Comparator by Salary Arrays.sort(empArr, Employee.SalaryComparator); System.out.println("Employees list sorted by Salary:\n"+Arrays.toString(empArr)); //sort employees array using Comparator by Age Arrays.sort(empArr, Employee.AgeComparator); System.out.println("Employees list sorted by Age:\n"+Arrays.toString(empArr)); //sort employees array using Comparator by Name Arrays.sort(empArr, Employee.NameComparator); System.out.println("Employees list sorted by Name:\n"+Arrays.toString(empArr)); //Employees list sorted by ID and then name using Comparator class empArr[0] = new Employee(1, "Mikey", 25, 10000); Arrays.sort(empArr, new EmployeeComparatorByIdAndName()); System.out.println("Employees list sorted by ID and Name:\n"+Arrays.toString(empArr)); }} |
1 2 3 4 5 6 7 8 9 10 | Default Sorting of Employees list:[[id=1, name=Pankaj, age=32, salary=50000], [id=5, name=Lisa, age=35, salary=5000], [id=10, name=Mikey, age=25, salary=10000], [id=20, name=Arun, age=29, salary=20000]]Employees list sorted by Salary:[[id=5, name=Lisa, age=35, salary=5000], [id=10, name=Mikey, age=25, salary=10000], [id=20, name=Arun, age=29, salary=20000], [id=1, name=Pankaj, age=32, salary=50000]]Employees list sorted by Age:[[id=10, name=Mikey, age=25, salary=10000], [id=20, name=Arun, age=29, salary=20000], [id=1, name=Pankaj, age=32, salary=50000], [id=5, name=Lisa, age=35, salary=5000]]Employees list sorted by Name:[[id=20, name=Arun, age=29, salary=20000], [id=5, name=Lisa, age=35, salary=5000], [id=10, name=Mikey, age=25, salary=10000], [id=1, name=Pankaj, age=32, salary=50000]]Employees list sorted by ID and Name:[[id=1, name=Mikey, age=25, salary=10000], [id=1, name=Pankaj, age=32, salary=50000], [id=5, name=Lisa, age=35, salary=5000], [id=10, name=Mikey, age=25, salary=10000]] |